Ladies Who Soap

January 2017-

When I was a kid thinking about anything past the year  2000 was difficult to comprehend.  It seemed eons away as I entertained the thought while enjoying running around playing with family and friends while we laughed as we tried to catch lightening bugs before our folks called us home for the evening. 

Ahh nostalgia…

This month’s  Amy Warden Soap Challenge involved making soap with someone who doesn’t make soap and this collaborators thing intrigued me.

Now my friend Cindy is not only a dear friend but she is one who loves a challenge. 

I remember introducing her to embroidery and cross stitch by inviting her to make a Walmart run with me. I was on the hunt for Bucilla kits. Having successfully completed several of the kits I was driven to find more of these relaxing pass time crafts. I asked Cindy to come along to help me suss out locations that carried the kits.

We found a Walmart in San Dimas that had a healthy stock of bucilla kits. I bought pillowcase kits, table runner kits, tissue box holder kits and tons of colorful floss.

Cindy bought one kit. A bucilla kit that once complete could be a small table cloth or with batting and backing added could be quilted. Cindy made it a quilt. This was a lot that could easily have taken a couple weeks to finish. Cindy finished it in 2 days. She said once she started she felt compelled to continue stitching. She did this over a weekend. So yes she a tad competitive. 

When I asked Cindy if she was interested in making soap once she stopped laughing she said yes so we made a soaping date.

I had her Google handmade soaps to help her with ideas for technique, design and scent.  She mentioned she was interested in making a lemon soap with goatsmilk and basil. Totally doable I told her.  Having made several successful batches of soap where I substituted in fresh lemon juice for all water.

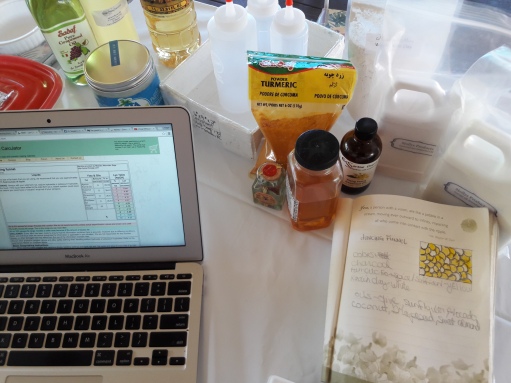
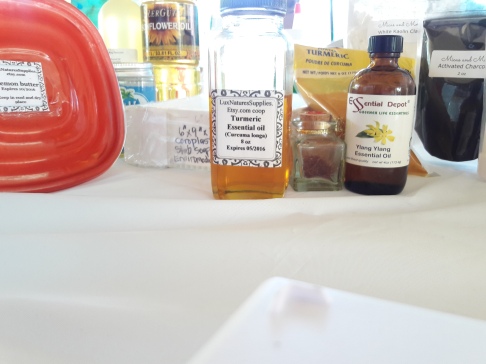
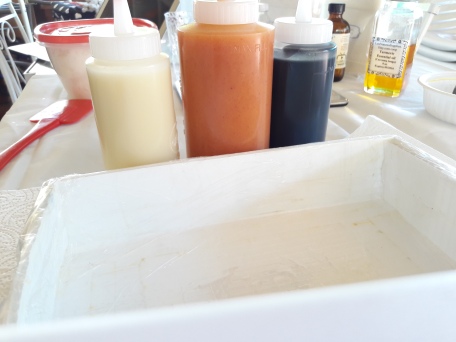
I decided to try and get most of the ingredients for this challenge in grocery stores and markets nearby. Here is a pic of locally sourced ingredients.

The only items not purchased locally were the babassu, cocoa butter and the basil essential oil. My goal was to show my friend that she could make a good soap with items from grocery stores in her area.

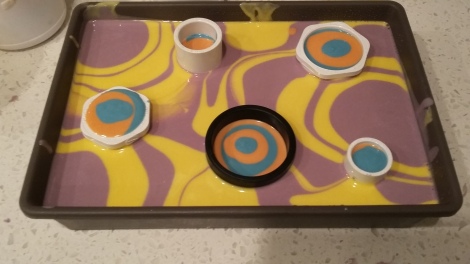
To help my friend with design I narrowed the choices to two and put items in the bags labeling them “tube it”(faux funnel) and “hang it”(hanger swirl)

She chose the hang it (hanger swirl) bag.

Here is hanger swirl demo.

Cindy showing respect for the LYE.

Here Cindy wipes the plastic cup(used to measure dry lye)  down with a dryer sheet to reduce the “dancing lye crystals” show and burn.

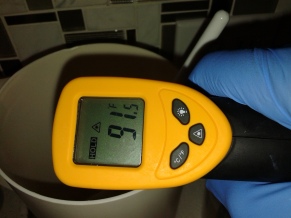
Sprinkling lye crystals into slushy cold fresh lemon juice.

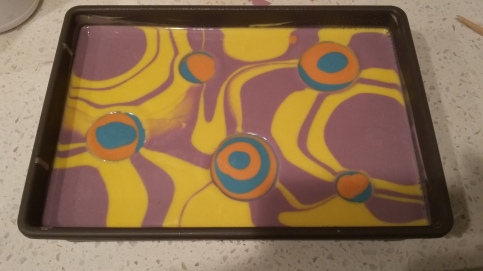
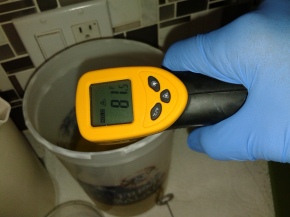
This is how the batter looks when the lemon juice and oils “both cooled to room temperature” began to hook up!

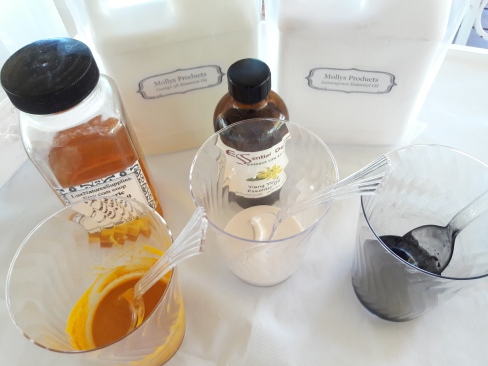
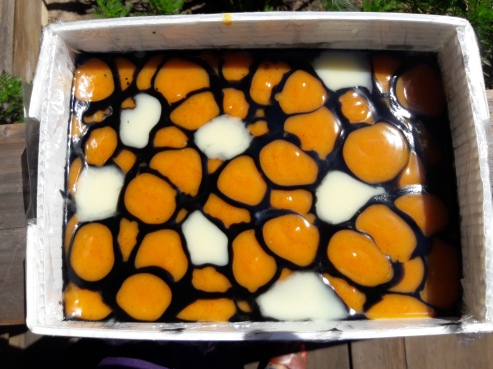
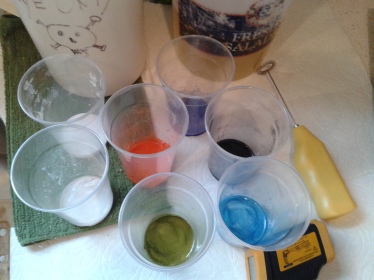
At light trace Cindy separated her batter into 2 cups with main portion of batter left in the bowl. She used natural colorants turmeric and cocoa powder.  The main batter was not colored. In past batches of 100% Lemon juice soap I’ve noticed the lemon juice usually makes a nice off white cream color.

After pouring of the cups she saved a small portion of batter to decorate the top.

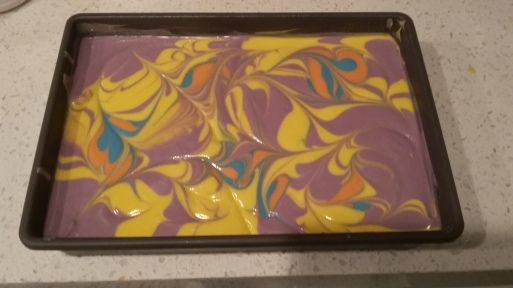
Decorating the soap top using a chopstick to pull the colors into swirls. 

More surface chopstick play.

Cindy Makes Her First Soap

She did it! 

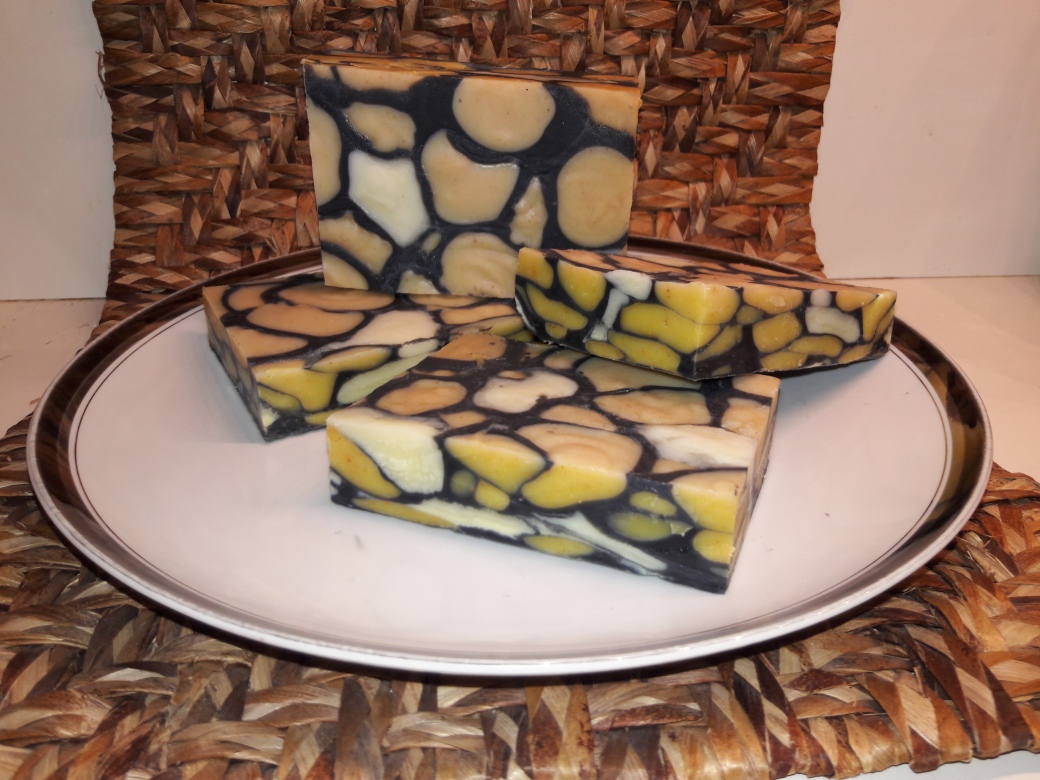
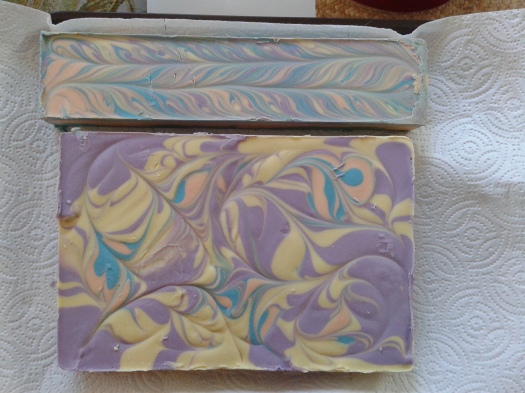
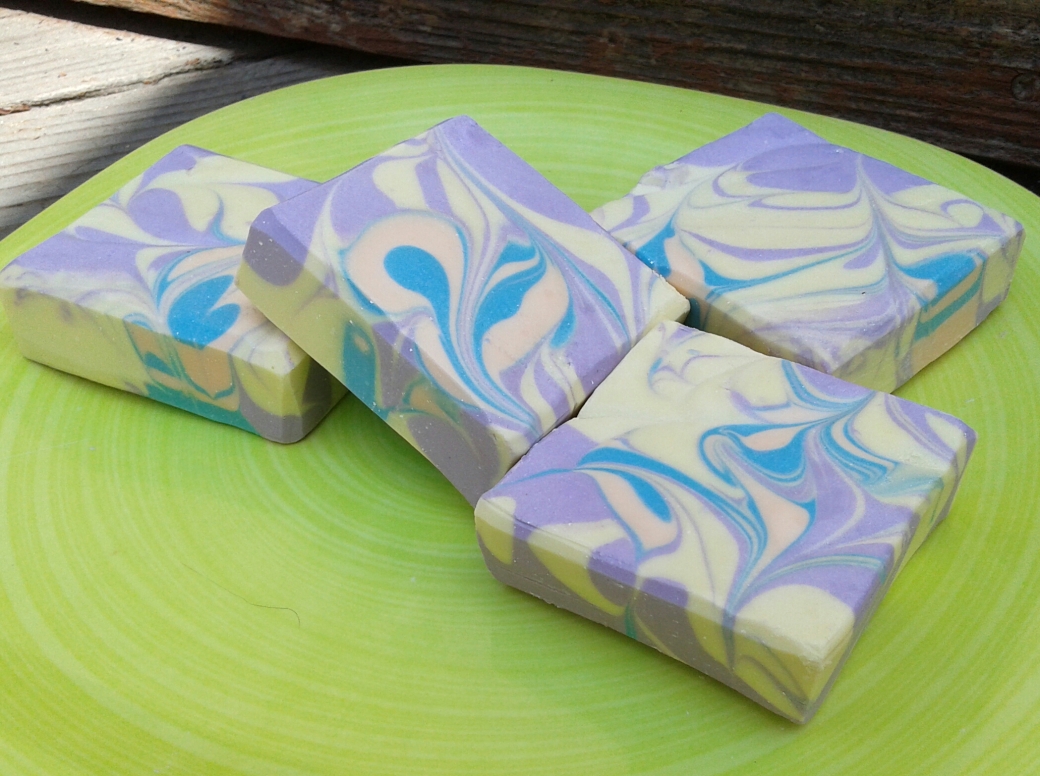
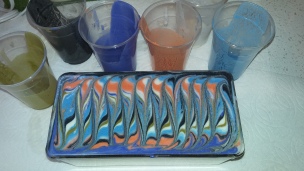
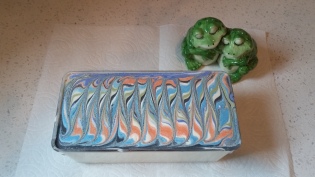
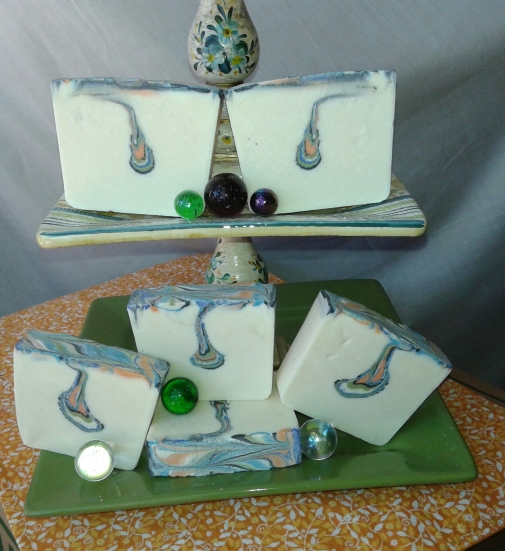
After a 2 day sapononap here is the cut. Cindy cut some bars with the ripple cutter and some without. The soap is scented with lemon, grapefruit and basil essential oils. Colored with turmeric and cocoa powder. The addition of goat’s milk yogurt cocoa butter and a bit of cumin (black seed oil)to the batter make this soap a luxurious decadent body treat. She has put them up to cure out for the next four weeks.

We had a very fun time hanging out, laughing a lot and making a wonderful batch of friendship Soap.

We also shot some footage that we hope someday to edit into a video to share so check back.

Thanks to Amy Warden and Kenna for hosting this fun Collaborators swap. 

SUNTASTICALLY  Part of Me: A Quilty Tale

I had no idea what a fun journey lay ahead of me when I  opened an e-newsletter from Southern California Council of Quilt Guilds to see an announcement for a quilt challenge hosted by SCCQG. The idea of creating a textile piece depicting my point of view of Southern California sounded intriguing. The challenge to capture So Cal in a quilt using fabric, embellishments and what not gained my attention.

I am a stand up comedian and my shows have taken me all over the world. My love of quilting and comedy brought me to the realization that I am bonafied QOMEDIAN!
I enjoy driving to local shows which  have taken me all over the west coast top to bottom left to right.  Having seen many beautiful vistas  driving around our beautiful state  I knew I had a Costco sized shopping basket of  inspiring ideas in my crafty cache.

It was at my friend’s home that an idea began to percolate.  My friends have a beautiful photograph of a Joshua tree in the desert taken at dawn as the sun began its ascent.  Bingo! Idea starts to blossom.

 I  began searching my stash and the stash of friends for fabric colors and motifs with a desert feel. I started with this color combination.  Stratosphere to ground cover with black Velcro strips simulating trees.

With the colors laid out I could see potential but with so many hue and tone possibilities I began to feel overwhelmed.  At that point I took a mental 2 steps back and decided it would behoove to start with a smaller piece so I made a desert themed postcard.

Working this small showed me how I might give dimension by adding silhouettes, layering and embellishments.

Here is a beginning layout.
Notice paper Joshua tree at the lower right corner. Wanting the scene to have a desert near sunset appearance I sorted and chose fabrics.

Some of the prettiest sunsets I’ve witnessed have included some kind of shading. In the photo I played with dark crinoline and tulle to see which one would cast the best shadow. Also played with shadow positioning. How landscapes look when the sun began to set, what’s is in shadow.  The tulle while giving best shadow added  a bit too much glimmer.

In January of this year I began wearing long braids. Every few months the braids are removed and a completely new set are braided into my hair, which by the way has grown a lot from wearing the braids.

The last time I got my hair braided I kept a bunch of the old braids. I washed them and added them to my embellishments bag. My thoughts at the time were to up cycle them into a future project.

I like to add elements recycled for an eco quality so it was not out of the ordinary one night well past midnight as I worked on the quilt that a “up-cycling,what if” idea ping pong about my crafty skull.

Something implored me to check out the bag of braids and that is from where the braided tree idea emerged. I was happy I’d used the Joshua tree theme in the fabric postcard.

For quilting I stitched in the ditch and used some stencils to quilting movement in areas of the quilt.

Then I started playing with the braids. How many braids would be most tree like. How big to make the tree, where best to place it? How to give it dimension  and perspective? That tree made rounds all over this piece. My quilting friend Alice suggested looking at the quilt from all sides to see if it was balanced color wise. I took a cellphone photo and using her suggestion I rotated the quilt photo which  helped me see the best placement for the tree. Adding a smaller tree silhouette helped lend dimension.  I thought it would add interest to have the two branches like each other enough to form a heart.

The tree corner still needed some light color.  As I pondered what to do an old familiar song came to mind and I noticed I was whistling “🎼Tie a yellow ribbon round the old oak tree🎶 it’s been three long years do you still ❤me🎵🎶  

Dancing to my yarn box I braided (heh heh on a roll here) a length of yellow yarn and tied it around the tree.  Done and almost done. Next up I stitched a rolled border and started on the hanging sleeve. A four inch wide hanging sleeve is usually needed for most quilts to hang in a quilt show. Having helped hang quilts for many a show I’ve admired the quilts that showcase great sleeveage 😀 it really helps to decipher the bottom of the quilt from the top when viewed from the back of the quilt if the hanging sleeve is a different color from the quilt back. I chose bright rainbow colored fabric to make my sleeve.


My friend Jean a fabulous quilter and blue ribbon winner made the beautifully  embroidered label that I hand sewed into my quilt. 

In return I gave her a set of handcrafted fish embed glycerine soaps. 

Her bathroom decor is ocean aquatic with clamshells, seahorses and dolphins.  It was a joy to see in person the soaps looking so cute in her bathroom. She says they look like they are in an aquarium and She enjoys looking at them while using the facility 😁

It felt so rewarding  to see my quilt on display with so many beautiful quilts. I Look forward to adding SUNTASTICALLY A Part of Me to my trunk show. 

QuiltFest Oasis Palm Springs CA Oct 6-8, 2016.

I Can Dance If I Want To

And…boy howdy if I didn’t find myself doing some fancy footwork in effort to keep up during this challenge. There is no shuffle off to buffalo time when trying to get this soap in the mold using squeeze bottles.  It was more stick and move, stick and move, shake shake shake, HURRRRRRYYYYYY!

I decided to go the natural route as I drew my outline for this soap challenge picking  oils and colorants. My base oils I went with Sunflower, Grapeseed, Sweet Almond oil, Coconut oil and some lemon butter as a super fat. I knew I was using lemongrass essential oil as my major scent for this challenge and the more I thought about it the more I liked the idea of doing my soapy impression of a busy bee.  Here is what I imagined as sketched and colored in my idea book.

dancing funnel recipe etc

My notebook played a part in deciding how to go about brining this funnel pour technique to life.

saffron

My Saffon trial. On the right saffron in olive oil for over a week. Did not pull color. On the right saffron in water for 10 minutes…

colorants natural

colorants used tumeric, kaolin and activated charcoal


dancing funnel eo's

scent used lemongrass, 5X orange essential oil, ylang ylang essential oil and tumeric essential oil.

My base oils percentage wise were about 25% hard oils to 75% soft oils. I factored this equation to allow as much funnel pour time as possible.

sun heated base oils

I decided to harness sun power to heat my base oils while waiting for my lye water to cool.

dancing funnel

Squeeze bottles filled and ready to rock n roll.

The middle squeeze bottle contains soap batter colored with tumeric essential oil as well as saffron and ground tumeric. The dark bottle is colored with activated charcoal. The white, kaolin clay.

dancing funnel poured soap

Busy Bee Funnel Pour ready for a sun sapononap!

This the end result after all the squeezing was done. Well actually I ran out of black just in the nic of time.I had lots of orange and a bit of white batter left over which was poured into a small log mold.

I sat the slab out in the sun covered with saran wrap and was pleasantly surprised to see that the sun had done what a 170 degree oven would do…for FREE! Yeah baby!!! I have sun cpopped before but forgot how fun it can be. The soap was cooled and solid by nightfall. Both slab and log released easily from the molds. Of course the ole school soaper that I am had to tongue test for zap, just because and was rewarded with the no zap but the lovely taste of lemongrass, yeck! The ole soaper in me also decided to lather test and was rewarded with amazing lather. The bars will be shelved for the appropriate cure time but it super nice to know I GOTS SUDS!

I sliced the slab into four healthy sized bars that smell incredible. I am hoping with fingers crossed that the kaolin clay does it’s job in anchoring all the citrus EO’s I used in this batch.

Here is how my batch turned out. My friend and soap pal extraordinaire Durty Gurl Flare just whipped up her own rendition of a soap beveler planer. I plan to sneak over and spiffy these bars with said planer. It’s good to have talented friends in crafty places! Thanks for reading my try at eco friendly Sun Cpopped Dancing Funnel Busy Bee Soap!

dancing funnel soap bars

It’s All About the Pipe, Baby!

This month’s Amy Warden soap challenge involved the word pipe which caught my attention pretty darned fast. I couldn’t imagine how a lead pipe might be involved in soap crafting. Since 1999 when after much research at the library(didn’t have the convenience of google or internet much back then) I attempted my first batch of soap which ended with success…but I digress.

So one of the things about soaping is you, me and whomever it be, cannot make “real soap” without  the addition of lye aka sodium hydroxide if’n you wanna get all persnickety, smile. Lye is corrosive and does not play fair with most metals except for stainless steel. So I soap in safe thick plastic buckets or my ceramic lined crockpot that is dedicated to my soap crafting hot process batches.

See why the word pipe  had me sitting in the lap of wonder with a big ole tiara decked with dancing question marks circling my head? Hardy Ha Ha and HA!

I signed up for the challenge because this one spoke to me like a …well, like a lead pipe!

A gander at the links provided shed light like dawn on a fresh new day. I thought to myself as I watched the fun “Oh yeah, this ones for me”. Sometime later, off I skipped, ahem okay I drove but in my head I was skipping, to the hardware store to buy little round doohickey thingies from the plumbing section. They are made of strong plastic and are indeed pipe shaped. My pan which is from BB&B was a lined textured drawer bin. It cost under $5.00 and was an impulse purchase after getting my mitts on the pipes!

pipe swirl mold set up july 2016

With my basic recipe I am ready to pipe play.


20160705_022606

Traced soap split into 4 cups colored and ready to begin pour

20160705_023316

I liked the pipe pouring play. It takes focus and careful speed.

20160705_023540

Pulling of the pipes was interesting. I was crossed my fingers hoping I didn’t accidentally drop a pipe back onto the soap.

20160705_023756

I found the skewer action quite fun!

20160708_181254

Super busy with upcoming holiday activities this soap was in the mold for several days. The log was poured from leftover soap batter in the cups.

20160715_110334-1

A few days after releasing from the mold the bars were cut and trimmed. They smell incredible. I made a blend of essential oils using lavender 40/42, lemongrass, 10 fold orange and a pass of the pot with eucalyptus.

When all was said done and done this batch is one I’m happy with. Though still curing I have had non-soapcrafter folks sniff and ooh la la this soap. The blend in this batch makes the bars smell like  sweet summertime.  Perhaps that is what I’ll name it. Thanks for reading along. I welcome your comments.

Pipe swirl soap trimming

When Suds Lye…

Wasted days and wasted nights!

Those words from Freddy Fenders song rang over and over in my head as I finally got off the soapbox and scooted it out of my way for some soaping therapy play.

Perusing the web I stumbled upon the teardrop video of Sergio Masala a few months ago and talk about eye candy, jumpin’ jehosaphat the soap he created was one masterful artistic cake.

Quel Surpris when Amy Warden announced the May  2016 Monthly Soap challenge would be the teardrop swirl.  Signing up for the challenge I read all the information I could find on this technique and was again surprised to learn the technique had actually been introduced by a soap craft artist known as Sweetly Sweetly Sweetly. Between Amy’s teardrop swirl demo, Sergio’s and Sweetly3 I spent some good time checking out this method. I also found Kevin Devine’s teardrop swirl video on youtube to be helpful.

Following Amy’s advice on the challenge page I wanted to design a recipe that utilized a lesser percentage of hard oils and leave out butters and clays that could possibly excellerate trace.

For my slow moving recipe I designed a 25/75 oils ratio. 25% hard oils to 75% soft oils.  I went with Avocado, Grapeseed, Coconut, Olive and Sunflower oils. My temps for oils and lye water were under 100 degrees.  I used a 33.333% lye concentration with 2 to 1 water to lye ratio.


20160506_163625

Let’s get this party started! Oils, Lye water, micas and scent blend ready to rock, roll and soap!

For this session I used  all Mad Oils micas. Wicked, Silverfinblue, 3 Olive martini, Twilight,Phyllis Diller and Tangering. For my scent blend I used 80/15 Lavender 40/42 to Lemongrass essential oil with 5% a mere whiff of the awesomely scented Black Raspberry Vanilla from Brambleberry.


20160506_164009

Oils temperature

20160506_163950
33.333% lye concentration. 2 to 1 water to Lye/Sodium Hydroxide ratio. 

I cut up a half a cotton ball size of tussah silk in the lye water and added 1 tsp ppo, to lye water as well.

The hardest part of this method is keeping a steady hand. My first few runs were wobbly. It takes a moment to figure out which direction to start the cups pour. A slow steady hand helps.


20160506_175542

After filling the mold I finished by scraping cups onto of soap in horizontal lines then running a chopstick side to side vertically.

20160507_145035

After 24 hour saponanap!


20160513_121459-1

Phyllis Diller’s Delight!

How I made this soap